


Mandingo Rex
-
Posts
189 -
Joined
-
Last visited
-
Days Won
1
Content Type
Profiles
Forums
Events
Articles
Posts posted by Mandingo Rex
-
-
Did you scale them all to fit? That's one thing I can think of that won't work.
They all need to be scaled to the same proportions. Or you may need to tile them, or scale them all to 40% or something. Without knowing your setup, I can't really troubleshoot for you. Hope that helps? Or if you can provide more info, that'd help, too.
-
Wow, necropost! Haha. No worries.
It's not a true "render" because I didn't actually model it in 3D. It was a composited "render" in Photoshop, just to show what it looked like. So I never modeled it in the 3D modeling sense, sorry.
As to an update on the state of the Nemesis control panel that I showed earlier, I really haven't done much to it since my last post. Unfortunately, I lost my job (3 years ago, this has been awhile) and then I got a new job and have been basically swamped since then. I also grew disinterested in finishing it. Perhaps one day I'll hop back on it, as it was interesting and something I want to complete. I'll post updates when/if I get back to it.
Or, if someone wants the PSD to finish it on their own, feel free to contact me via PM and I can try sending it to you to finish. All I ask is that it's shared with the fandom, for free, and not used for profit.
-
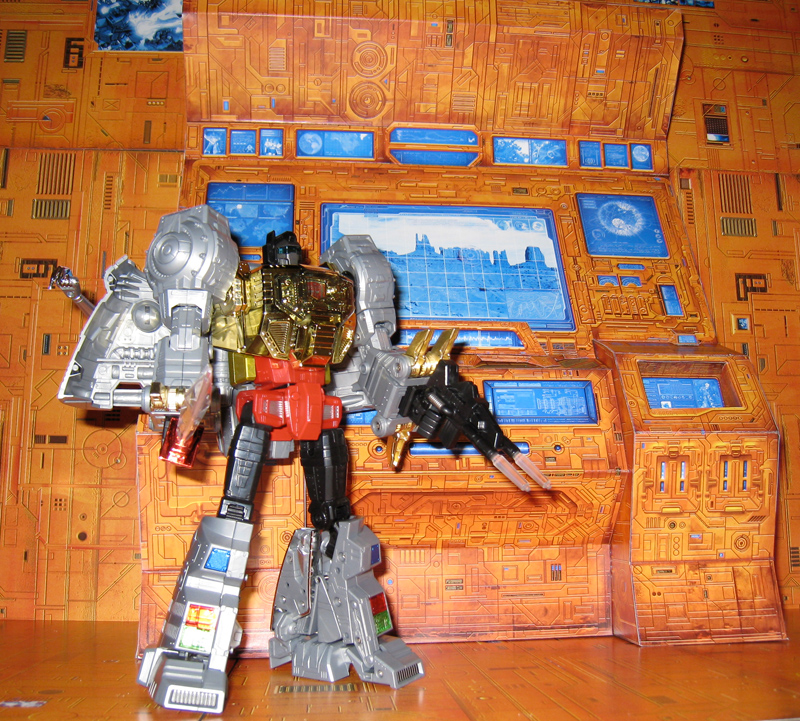
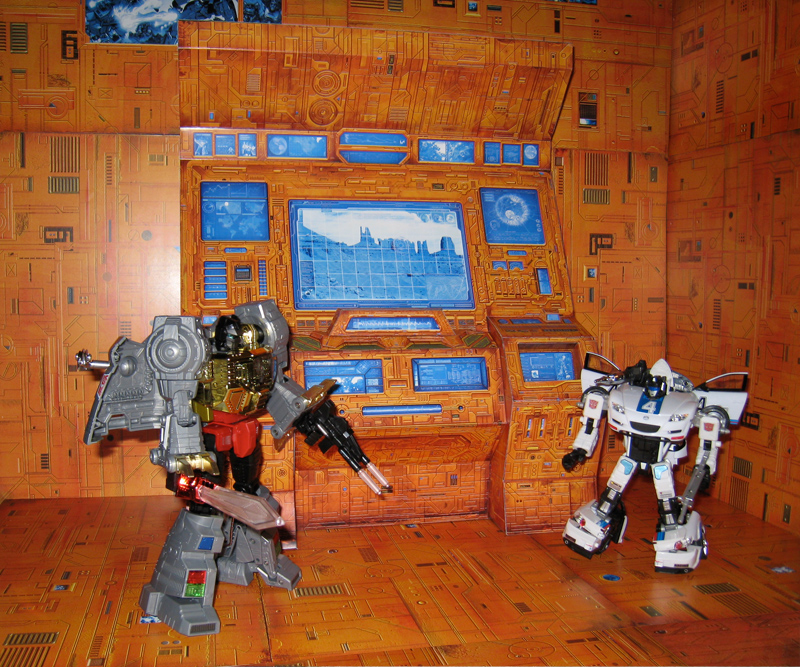
Sorry for not posting again, I read your advice and finished it up Sunday night. Took a few pics of the construction and the finished product. Next I'll work on making some "wallpaper" to line some shelves with.
Looks great! And thanks for posting the pics! This is one of the better ones I've seen, too! Not to mention the photography's really crisp, which I suck at for some reason. :)
-
I don't have mine anymore (I traded it to Valkfan for some head sculpts) but if I remember correctly, I simply glued it with hot glue. If you use a laser-printed version though, be careful, as hot glue will melt the ink. I would suggest using either tabs or perhaps just putting a heavier drop of glue behind the "foot" area (the 5 "finger"-like parts that stick out) and letting that hold it down. It won't be a perfect snug fit, but it should be pretty close.
I don't think it was hot glue MR because as time has went on, the artwork has slowly peeled away from the backing and there's no glue to be found or discoloration to be found. I thought you had used some type of clear paper glue.
I can't remember exactly what I used where, but I used a mix of 3 types of adhesives.
Hot glue to hold the actual boards together, spray mount to spray the artwork onto the foam core, and rubber cement around the edges that pulled up on me (they always do over time). You could try getting a small bottle of rubber cement.
Not sure if everyone's used the stuff, but you brush it on both sides, let it get tacky and then stick them together. The good thing is, you can use a rubber cement eraser (or your hands, but it's toxic and not recommended for skin contact) to remove any excess.
Bummer it's coming apart, man. :-/ you can try the above method for corners, hopefully the whole thing isn't coming undone!
-
So I've been diligently working on this and came up with a question this AM. What's the best way to connect the Center Console to the main unit? I don't really want to glue it for fear that I'll mess up the surrounding area. I thought about cutting it out with some surrounding white space and making tabs with matching slits in the mainframe but that might not work real well either. I don't really want it to just sit on the top unless that's the best way. Any advice would be great!
I'll definitely put up pics when I get it completed. I ended up shrinking the original to 45% which from the looks of things is gonna fit perfect with Classics and Universe figures.
-G
I don't have mine anymore (I traded it to Valkfan for some head sculpts) but if I remember correctly, I simply glued it with hot glue. If you use a laser-printed version though, be careful, as hot glue will melt the ink. I would suggest using either tabs or perhaps just putting a heavier drop of glue behind the "foot" area (the 5 "finger"-like parts that stick out) and letting that hold it down. It won't be a perfect snug fit, but it should be pretty close.
Hope that helps, and doesn't confuse you. :)
-
Just wanted to drop in and say Thanks for making these. Got the link from someone on TFW and joined up here so I could see the progression and stuff. I'm considering re-arranging my entire TF setup with these in mind. Glad you got a new job too! Thanks again!
-G
Not a problem guys! If everyone can do me a favor, and post pics when you get your displays set up, that'd rock!
I'm glad to help everyone out by providing the files for them :)
-
First of all, thanks guys for the positive replies.
Secondly, sorry for missing the last few posts, for some reason my subscription to this thread doesn't always work and I don't get emails to posts.
Gret job Rex, it is possiible to do some instructions to assemble, and put a space (border) to glue the pieces to one another.
Regards
Actually, there are instructions on the high-res artwork. :) Simply download it and you'll see. I apologize if they're confusing, but they're the best I could manage.
I didn't make tabs because there are multiple ways to construct it and assemble it—but although I've only built one full-scale once, I didn't actually need or use any tabs. You'll have a higher quality construction if you don't even use them.
I constructed it leaving the bottom open for access, and then used tape and hot-glue on the backsides (or inside, I guess), after spray-mounting the artwork onto black card stock and black foam core. I made the two sides from foam core, and the folding parts were all card stock (because the heavy foam-core is good for stability, but the fold parts need to be thinner so you can fold them, obviously). You could use tape to hold it together, but I feel that hot glue works best to hold the seams together. All of this is going to be on the inside, so it won't matter.
Watch out if using a hot-glue gun though... It can burn fingers, melt the foam core (if it gets on the foam part) and it also melts laser-printer ink, since laser-printers use heat to apply the ink.
Hope everyone enjoys the Teletraan. I'm still trying to get back around to the Nemesis, but 2009 was a rough year, and I've not had much spare time due to my new job. It's been a long time in the making, but hopefully I can get back around to finishing it up. :)
-
After 25 years of Takara and Hasbro dropping the ball, it looks like iGear is stepping up to the plate:
http://www.igear.tf08.net/?p=107
I just wish it was MP-scaled. :)
-
Wow it's huge! I thought the lower part was supposed to be around waist high. Mine seems very small now. Any way how is the Nemesis computer coming?
It is around waist high, to MP Prime. :)
Nemesis had to take a back seat unfortunately, while I'm job-hunting. The only reason I built the Teletraan was that I needed to use the office printers before my "last day" allowed in the office to use things. I had a grace period after layoffs to use my desk and office equipment, but that time has passed now, unfotunately.
-
Hey guys, updated pics. :)
I finally built her, and she's big. Now all I need is Casey Kasem's voice and we're good to go:

-
Thanks for the comments guys, and thanks for posting pics as well!
Apparently my "subscription" to this thread isn't working anymore, so I didn't realize there were new posts. Haha. I just figured it got buried in the threads.
An update on the Nemesis... Well, actually there's been a big pause to it, unfortunately.
The Christmas season got busy at work, and I was trying to stay as busy as possible due to layoffs occasionally happening.
Well, unfortunately my agency lost the account I was working most of my time on, and they just laid off 21 people, and I was one of them.
Sooooo I'm spending my days job-hunting, but fortunately for now I have severance pay running through mid-April, and I've had 3 interviews in the 2 weeks since I've been laid off, so I'm just playing the game right now trying to find a NEW job. Trying to be positive, this economy blows.
I'll get back around to it, I do plan to finish it sooner or later.
Also, this next week I'm trying to at least get a Teletraan-I built for Valkfan. We need to do some trades, and he lives about an hour away. :)
I'm trying to take some pics too. It's shameful I haven't even built my own, but I haven't had the time or the space to put it when it's built!
-MR
-
Just a little teaser/work in progress:
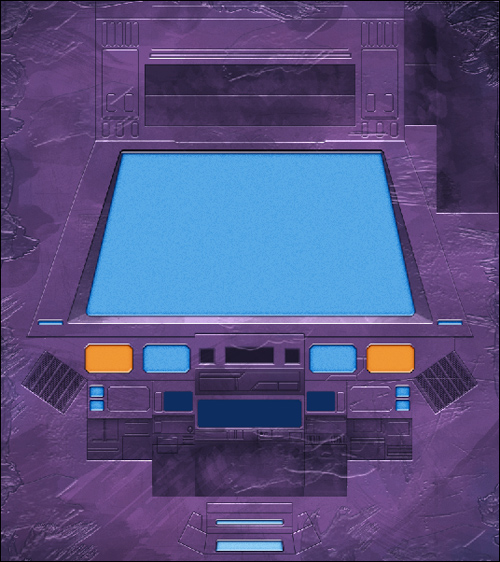
This is the layout of the front fascia like I want it, and you can see the inset portion at the top and bottom (little inset window folds in, the walls and new "back" are to the top right, rotate 90º to fit the space, and the inset "piped screen" area is started at the bottom...). It will fold like the cartoon reference (see below) but I haven't designed the side pieces that will fill the gaps yet. Also, the bottom isn't quite right, I need to do a test print/fold to make sure it all lines up before I get too involved with it any further.
Thanks to Trailbreaker77 for the screen shots of the Nemesis. I couldn't have done it without his help! :)
I'm basing mine pretty strictly off this reference shot he posted in this thread:

I liked it the best, and it felt the most "akin" to the Teletraan, but different enough without feeling too much different like some of the other Nemesis shots.
Obviously, I'll be putting my own spin on a few things and fleshing it out with my own thoughts on how it should look, but this was a very adequate starting point, as you can see.
Now comes the hours of work ahead... DETAILING this puppy. Last thing I'll be doing will be the screens, and then I'll post them with instructions like the Ark/Teletraan-I, available for everyone to download and assemble!
I MAY or may not make side pieces (like the purple walls with the orange circles, to either side of the Nemesis Mainframe) but I will definitely be making it a stand-alone piece just like the Teletraan-I version, and it will obviously attach to the Nemesis Walls to complete an actual "bridge/control room". We'll see how far I get with this. Sorry for the delay, but I've had some downtime and been itching to get back at this! :)
-
My stop motion animation of Starscream's Coronation at
Nice video but what does that have to do with MR's customizable backgrounds? It is a good video though.
Haha, I wondered the same thing myself. I think he was showing his Nemesis, which is pretty cool.
-
Hey guys, thanks for all the positive response!
I've taken a month or two off from this as my job has required me to focus due to cutbacks and I'm trying to avoid being "let go", but I plan to get the Nemesis back up and running soon...
-
Hey, thanks for all the kind words guys!
I never expected this to take off like it has!
I've been SUPER busy with work, and we are losing a fairly big account, so I have to be on my best behavior and burn the candle at both ends, so it may be a while longer til I've got much time to donate to the Nemesis computer...
I've got too many expensive hobbies to go jobless for long, if you catch my drift.
All I ask is one thing: POST PICS!
:)
-
I'd love to print it on vinyl, I've checked into pricing and it seems to be a little more than I'd be willing to shell out for something I don't really have room to display. Haha.
My ideal method of production would be to print it on vinyl, and then mount that to styrene. It'd be as good as a plastic playset then, and fairly durable.
Love to see it when you're done.
Anyone done a Nemesis layout yet?
BTW, work's been slamming me lately, haven't had any time to work more on the Nemesis, but it's definitely started and I'm finishing up the main layout, next will come the many many hours of detailing. THAT's the fun, tedious part.
-
Gonna kinda bump. This needs to be on the top page, darnit. :tflaugh
Actually, I was wondering, had you thought about doing a web page for Teletraan-1 / Nemesis and setting up a Paypal "donate" button on the page?
Haha. Actually, no I haven't. I think I may set up a page on my site though that's a little better designed so people have a "landing" page instead of a file directory. Also post updates, etc there.
Do you think people would Paypal donate? It's kind of you to offer, but I dunno how the majority would feel about that. :)
-
Like I said not trying to rush you. I'm just waiting, and looking forward to building the nemesis around this. I'm planning on building a throne for my Cl Megatron like the one in the wall paper that Apex Prime designed of Lord Megatron here.
If you want, go ahead and build your Nemesis. The Nemesis console is going to be roughly the same size as the Teletraan unit. My goal is to make them match closely so they fit in similar displays. You can expect it to take up the same space as Teletraan, if you want to get started building and just use that as a stand-in for laying out your display! :)
-
Rodimus VTS,
Started it, although last week at work was a bit "hectic" to say the least. Late nights, not much nerd-time. I'll post it once I get it to a stage where it's worth posting. I've started laying out the overall "die" if you will, of how it will fold, and general placement of things. Really rough right now though. In a way, it's easier, and more complicated, than Teletraan's design. It's going to have to fold fairly differently, and may take more pieces to fit together... But it will be the same level of detail, don't worry! :)
-
Sweet so next up is Meg's computer w/ Shock wave on the main screen right? Oh this is going to be sooo great.
Yep... I'm assuming from everyone that they want Shockwave on the screen?
I may be tempted to do more detailed artwork of ol' Shockwave. I just had a lot of fun illustrating Sgt. Slaughter for a custom G.I. Joe 25th box art, so we'll see where that goes.
Probably not that detailed, since it was mimicking the other 25th artwork, but something a little more detailed than the cartoon artwork.
-
-
Yep, I was going to suggest the same thing. Just use one of the simpler plates for the floor, would be my suggestion. If you'll notice from the screen grabs, the floors aren't that much different from the walls in the cartoons... Just less detailed usually.
And one thing I never even thought about, how is the Ark floor not tilted at least 20%?
The Ark is ALWAYS shown "crashed" at an angle into the mountain, but the Autobots always walk around inside just fine, on a flat surface.
So that's my explanation as to why the walls are the same material as the floor. The Ark is designed so that it always "designates" a floor and has it's own gravity system that designates the flattest plane as the "ground" plane. Smart cop-out, huh?
I'll be redesigning the Ark walls eventually, to detail them more. I may as well make a "floor" panel that can be tiled easier when I do that. I'll do that WAY down the road though. Gotta finish this Nemesis first!
-
Another small update...
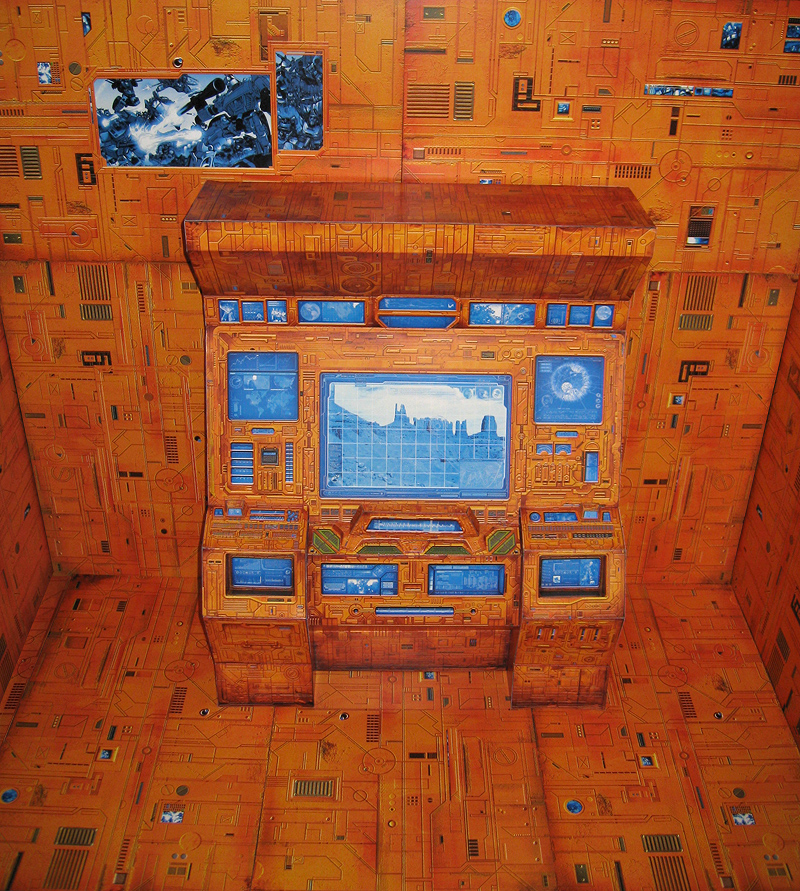
2 walls for the Nemesis, with screens. Coming soon, 2 "window" walls, then I'm moving on to the actual computer.
-
Download Nemesis Background Plate #6 »
So here's #6 guys.
For those of you who have asked, I'm going to do a few more modified plates for the Nemesis with at least one larger video screen, and probably 2 with big windows showing underwater scenes. How's that? They'll be modified from the previous Nemesis plates, of course, but different enough that you should still be able to tile them.
I'm actually thinking now I may go back and redo the Ark plates. They look so blah to me now.


Teletraan-I / Ark / Nemesis Display Panels!
in Upgrades
Posted
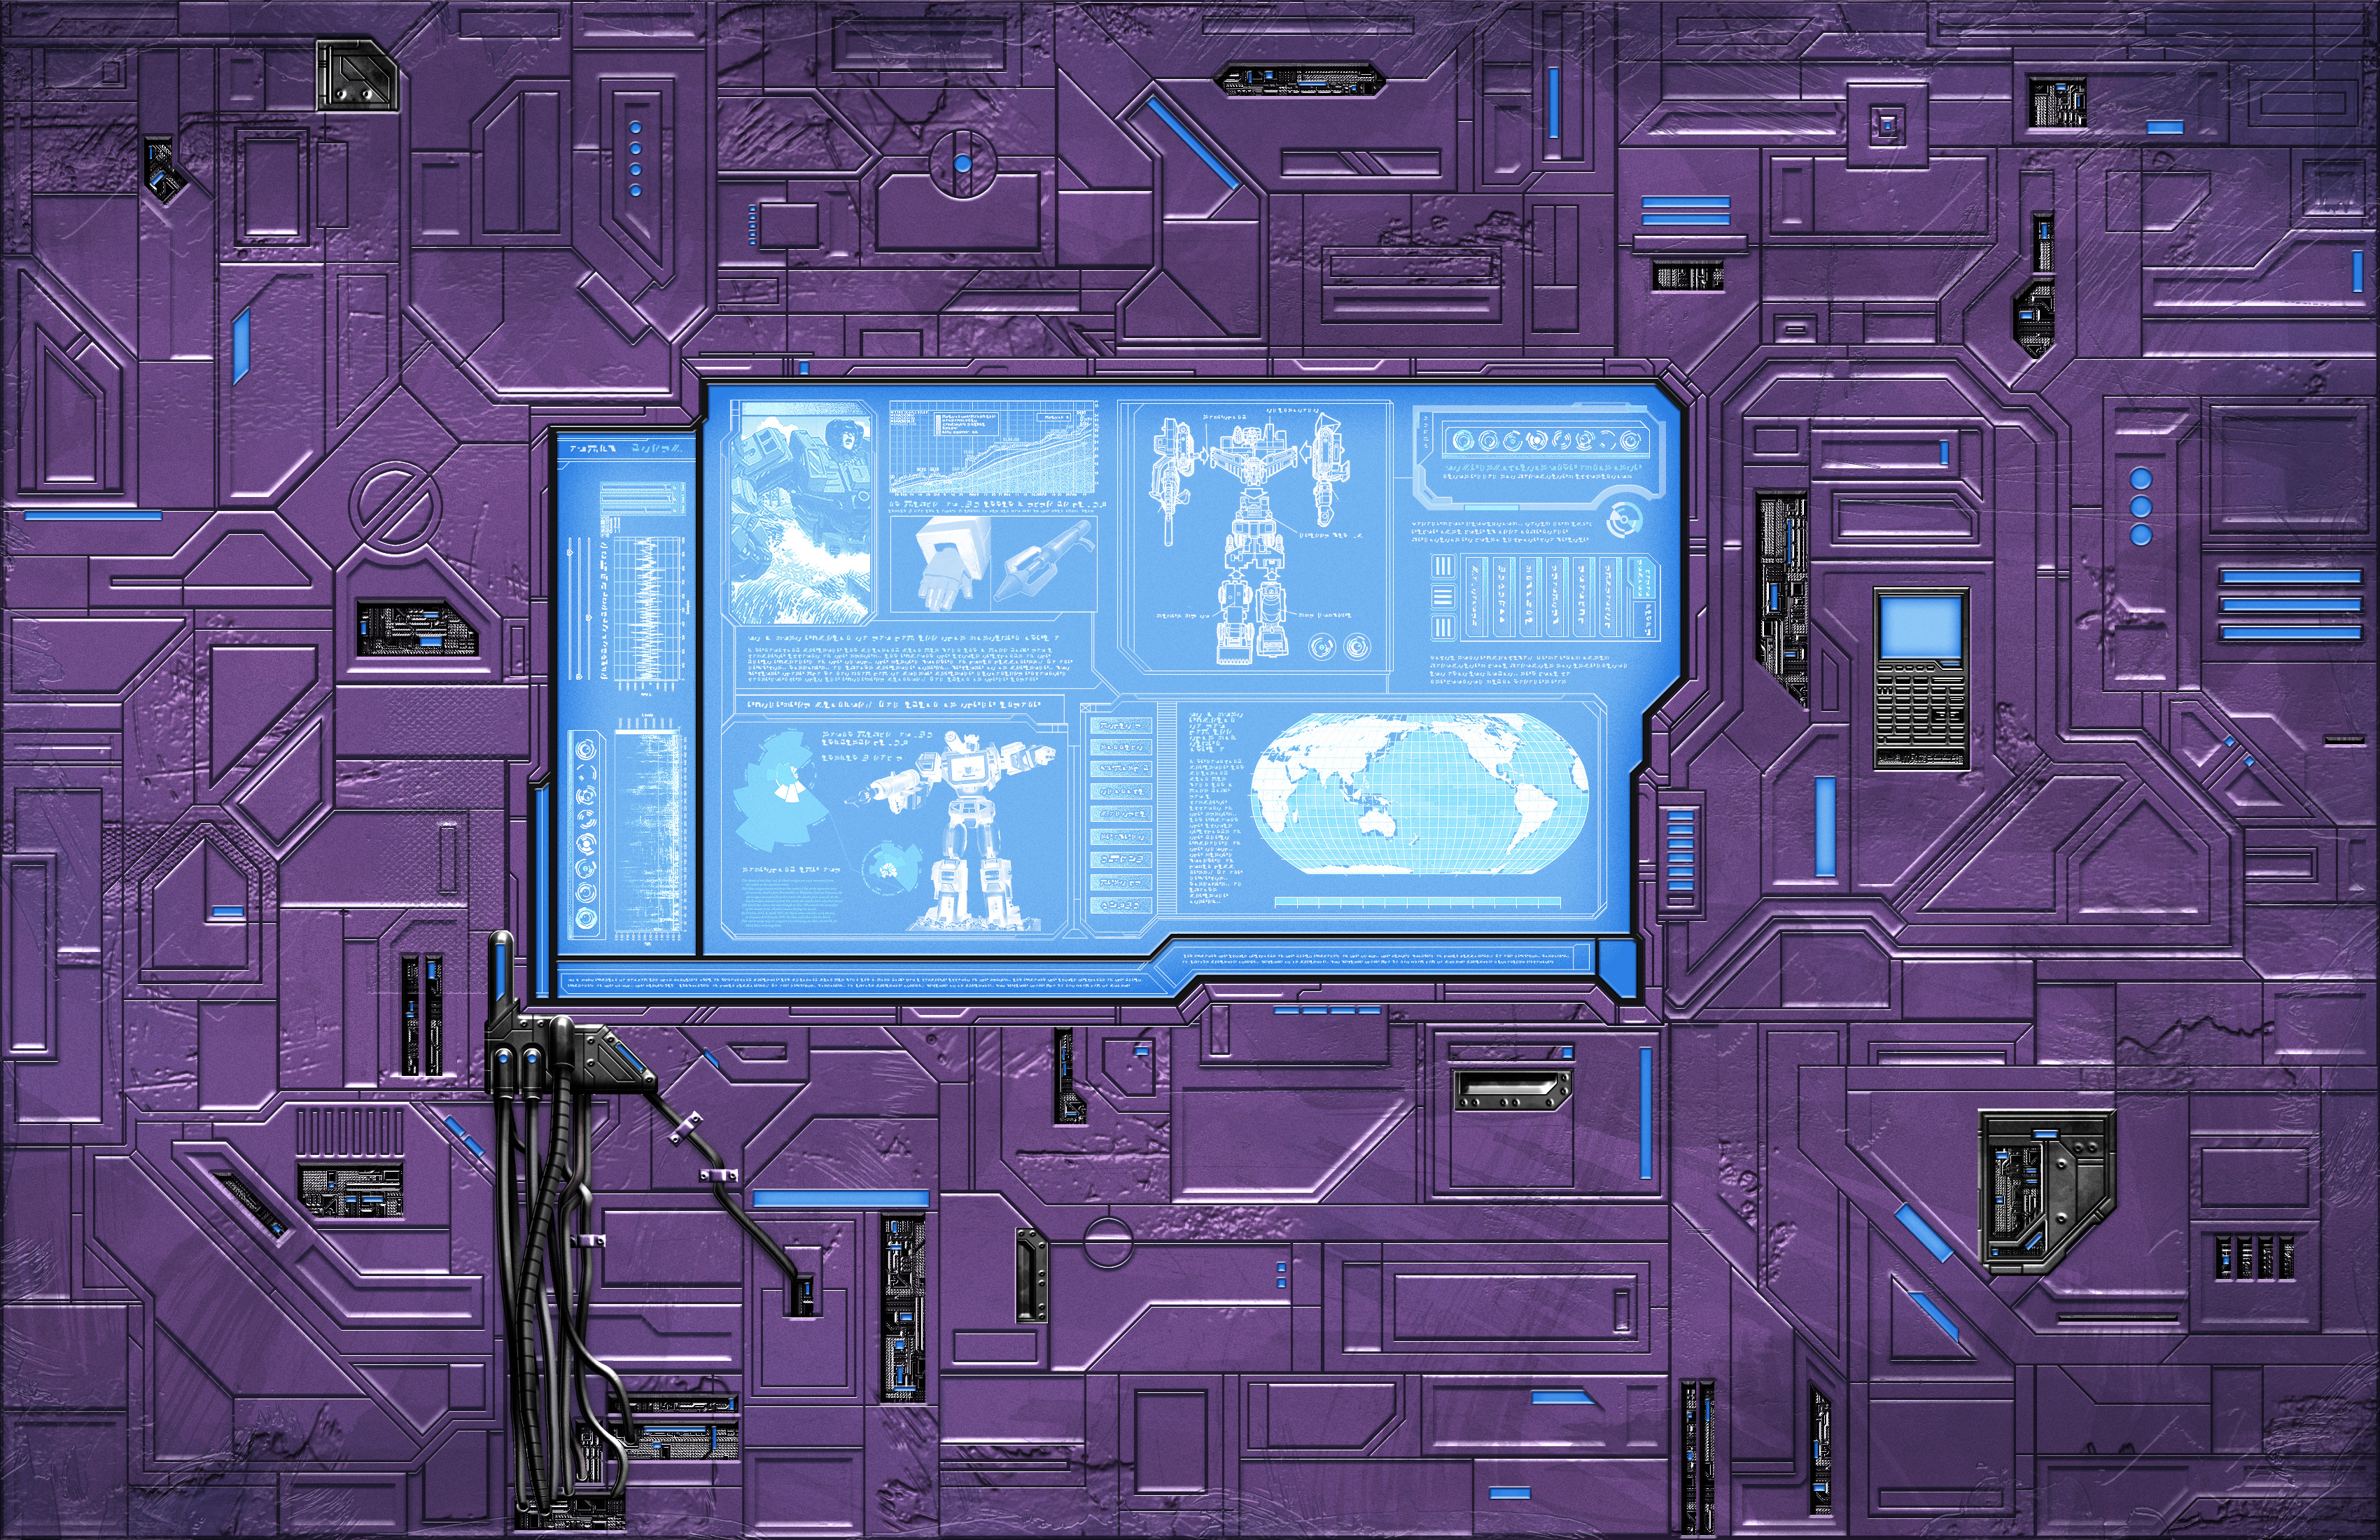
So I had some down time, and decided to dust off this ol' thing...
Here's about 8 hours of detailing work... Still a LOT of work left to do, but just getting the front fascia detailed today knocked out a lot of the legwork in getting it closer to being finished.
http://x4.ofgraphicdesign.com/projects/ark/nemesis_progress2.jpg
Not to give anyone false hopes, as I know this is a years-old thread and some folks have likely lost interest or given up on it, but it's my goal to finally finish the damned thing. Better late than never right?! :)
Also, just a reminder to folks... I don't mind if you download and print out the work, or even if you modify it, but please don't try to sell this, or pass off my work as your own without giving proper credit. It's available for free for the community. I caught this last night:
http://www.tfw2005.com/boards/radicons-customs/351401-custom-nemesis-command-center.html
And I wasn't very happy with it. Nor did I have anything to do with it. I know I borrowed some assets for the display screens, but I stated that multiple times in the thread. I've spent a lot of time on this, and all I ask is that people either give credit where it's due, or don't try to pass it off as your own. Not cool.